You have a spreadsheet full of contacts — names, companies, email addresses, and personalized details — and you need to send each person a tailored email. Doing this manually would take hours. Mail merge with Excel is the solution: you connect your spreadsheet data to an email template, and every recipient gets a message that feels written just for them.
This guide covers everything you need to know about Excel mail merge for email, including the classic Word method, modern Gmail-based approaches, and how to handle common formatting issues that trip people up.
What Is Mail Merge with Excel?
Mail merge is a process that combines a template document (or email) with a data source (your Excel spreadsheet) to produce personalized copies for each row of data. Each column header in your spreadsheet becomes a merge field — a placeholder like {{firstName}} or {{company}} — that gets replaced with the actual value for each recipient.
For email specifically, a mail merge from Excel works like this:
- Your spreadsheet has one row per recipient, with columns for every piece of personalized data
- Your email template uses merge fields that match those column headers
- A mail merge tool processes each row and sends a unique email with that row’s data inserted
The result: 500 contacts each receive an email that looks individually written, without you spending 500 hours writing them.
Mail Merge Excel to Word: The Classic Method
The traditional mail merge approach uses Microsoft Word as the document engine with Excel as the data source. This method has been around for decades and works well for printed letters, labels, and envelopes. For email sending, it routes through Outlook.
How it works:
Step 1: Open Word and go to Mailings → Start Mail Merge → E-mail Messages.
Step 2: Click Select Recipients → Use an Existing List, then browse to your .xlsx file. Select the worksheet containing your contact data.
Step 3: Insert merge fields using Insert Merge Field from the toolbar. Position your cursor where you want personalized data to appear, then insert the corresponding field.
Step 4: Preview results with Preview Results to spot any formatting issues before sending.
Step 5: Click Finish & Merge → Send Email Messages. Choose the column containing email addresses, set a subject line, and send.
This approach requires both Word and Outlook installed and configured on the same machine. It sends through your local Outlook account, which means no open tracking, no scheduling, no analytics, and no easy way to pause a send mid-way. Daily sending limits also apply.
How to Do a Mail Merge from Excel to Gmail
For modern teams that live in Gmail, the better approach is a dedicated Gmail mail merge tool that reads your Excel data directly. This gives you delivery tracking, open notifications, scheduling, and a much simpler setup — with no Word or Outlook required.
Here’s how to run a mail merge from Excel to Gmail in three stages:
Stage 1: Prepare Your Excel Spreadsheet
Your data quality determines your email quality. Before importing, make sure your spreadsheet follows these rules:
- Row 1 is your header row — these become your merge field names
- One email address per row — if a contact has multiple addresses, duplicate the row
- Clean column names — use simple names like
firstName,lastName,company,email(no spaces, no special characters) - No blank rows in the middle of your data
- Consistent formatting — all dates in the same format, phone numbers without mixed formats
Stage 2: Import Your Excel Data
Most Gmail mail merge tools — including Mail Merge for Gmail — work natively with Google Sheets. To use your Excel file:
- Open Google Sheets and click File → Import
- Upload your
.xlsxfile — Sheets preserves all your column structure - Verify your headers and data look correct
- Your spreadsheet is now ready to use as a mail merge data source
Send personalized bulk emails from Gmail using your Excel (or Google Sheets) data. Track opens, schedule sends, and merge attachments — all without leaving Gmail.
Get Started →
Stage 3: Write Your Email Template and Send
With your data in Sheets and Mail Merge installed in Gmail:
- Open Gmail and compose a new email
- Open the Mail Merge sidebar from the Add-ons menu
- Select your spreadsheet and the sheet containing your data
- Write your subject line using merge fields:
Hi {{firstName}}, your {{plan}} plan renewal - Write your email body inserting
{{fieldName}}placeholders wherever you want personalized data - Preview a few rows to confirm the merge is working correctly
- Send — either immediately or scheduled for the ideal time
Each recipient gets a completely individual email in their inbox, sent from your Gmail account, not a bulk mailing service.
Handling Multiple Email Addresses Per Row
A common challenge when running a mail merge with Excel data is contacts who have multiple email addresses. The most reliable approach depends on your goal:
To send the same message to multiple addresses for one contact:
- Add a column called
ccorbccin your spreadsheet - Mail Merge for Gmail supports CC and BCC merge fields — each row can have different CC/BCC addresses
- For truly separate sends, duplicate the row with different email addresses in the main
emailcolumn
To send to a list of emails stored in one cell (comma-separated):
- Split the cell into separate rows before importing — you can use Excel’s Text to Columns feature or a formula to expand the data
- One row per email is the most reliable structure for any mail merge tool
Excel vs. Google Sheets for Mail Merge: Which Should You Use?
Both work, but they have practical differences when it comes to mail merge workflows:
| Factor | Excel | Google Sheets |
|---|---|---|
| Gmail integration | Requires import step | Native — direct connection |
| Collaboration | Shared via OneDrive/SharePoint | Real-time collaboration built-in |
| Data import | Original source | One-click import from Excel |
| Offline access | Yes | Limited |
| Cost | Office subscription required | Free |
If your team already stores contact data in Excel, the workflow is: maintain your data in Excel → import to Google Sheets → run mail merge. This adds one step but keeps your source of truth in Excel while giving you the best Gmail mail merge experience.
For a deeper look at Google Sheets-specific mail merge use cases, see Google Sheets Mail Merge: 5 Real-World Use Cases for Gmail Personalization.
Common Mail Merge Excel Problems (and How to Fix Them)
Date formatting issues
Excel stores dates as serial numbers internally. When merged into Word or email, they sometimes appear as 45234 instead of April 30, 2026. Fix this in Word with field switches (\@ "MMMM d, yyyy"), or reformat the entire column as Text in Excel before importing.
In Google Sheets, format date columns as Plain text after entering the dates if you want them to appear exactly as shown in your spreadsheet.
Numbers losing leading zeros
Postal codes, phone numbers, and employee IDs often lose leading zeros (e.g., 00472 becomes 472). Format those columns as Text in Excel before the data is imported.
Currency values merging without symbols
Select the currency column in Excel, format as Text, then type the values with the currency symbol included (e.g., $4,200). Alternatively, add the symbol directly in your email template: Your invoice total is ${{amount}}.
Blank fields breaking sentence flow
If some rows have empty fields, the merged email can read awkwardly: “Dear , please see your attached proposal.” Prevent this by:
- Filtering out incomplete rows before the send
- Using conditional content in your mail merge tool to display alternative text when a field is empty
Know exactly who opened your merged emails. Mail Merge for Gmail gives you real-time open notifications and a full delivery report — so you can follow up at exactly the right moment.
See Features →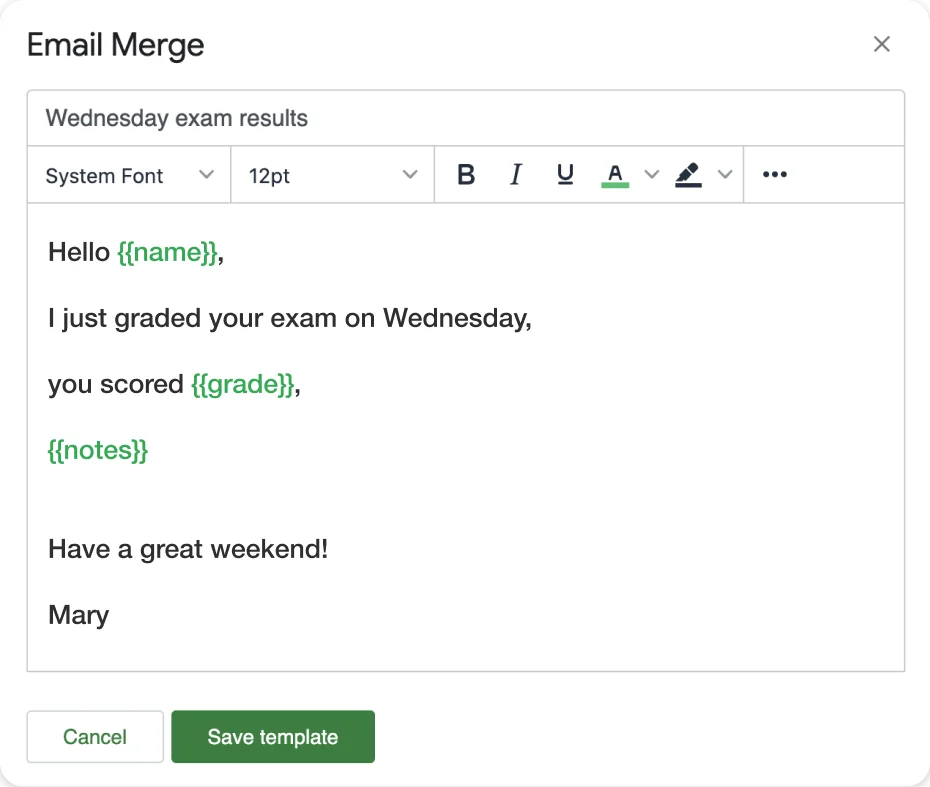
Mail Merge Excel Best Practices
Before you hit send on your next campaign, run through this checklist:
- Test with a small batch first — send to 3-5 test email addresses (your own or colleagues) to verify formatting, links, and personalization
- Check your unsubscribe mechanism — for marketing emails, include an unsubscribe link; many mail merge tools add one automatically
- Clean your list first — remove duplicates, fix typos in email addresses, and delete rows with missing required fields
- Watch Gmail sending limits — Gmail accounts can send ~500 emails/day; Google Workspace accounts up to 2,000/day. Mail Merge for Gmail respects these limits automatically
- Schedule for the right time — open rates vary significantly by send time; scheduling your merge to arrive mid-morning on a Tuesday or Wednesday typically outperforms Friday afternoon sends
For guidance on maximizing open rates and response rates from your merged campaigns, see Email Follow-Up Strategy: Use Open Tracking to Time Your Responses Perfectly.
FAQ
Conclusion
Mail merge with Excel is one of the most practical productivity tools available — it turns a static spreadsheet into the engine behind personalized outreach at scale. Whether you’re sending 50 follow-up emails or 5,000 renewal notices, the workflow is the same: structured data in Excel, a clean email template, and the right merge tool to connect them.
For Gmail users, the fastest path is importing your Excel data into Google Sheets and using Mail Merge for Gmail to handle the send. You get all the personalization of traditional mail merge plus modern features like open tracking, scheduling, and per-recipient delivery status — things the Word + Outlook method simply can’t provide.
Start with a clean spreadsheet, test on a small batch first, and you’ll have personalized emails in inboxes within minutes.